|
|
|
|
GL1500 GoldWing Fuel Pump replacement NOTE: This info is somewhat outdated, specifically in regard to the pump I used.
Another pump was found to work well by folks at GoldWingFacts.com.
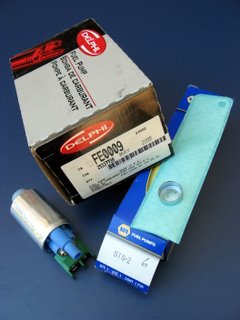
Here is a link to that Forum thread: Warning - legal liability notice! UPDATE! It was brought to my attention by a fellow Goldwing rider that this particular pump puts out 3 to 4 times the flow of the original equipment fuel pump (30 - 40 GPH vs. 10 PSI). The pressure is the same but flow capacity is much greater. His Honda Accord replacement fuel pump died after about 10,000 miles and he had to replace it yet again. The reasoning is that the higher flow causes the pump to overheat and die before its time. I did some more research and found that the Delphi FE00090 fuel pump is rated at 15 PSI (see pics below) so I ordered one and installed and tested it. Much to my disappointment it flowed just over 20GPH, still twice as much as the original Goldwing pump BUT much better than the Accord pump. For now, it would appear that this is the best replacement that fits with the modifications described. After seeing that advertised flow rates are not to be trusted I would flow test ANY pump purchased just to verify that is is suitable. Update to the Update: Looks like the
Delphi pump is no longer available. If you can find one, by all means snag it!
The only other alternatives are buying a used pump of questionable quality; buy
a new Honda replacement ($$$!) or there is (was?) a fellow on eBay selling a
"rebuild kit" for the GL1500 but I don't know if his pump has the correct flow
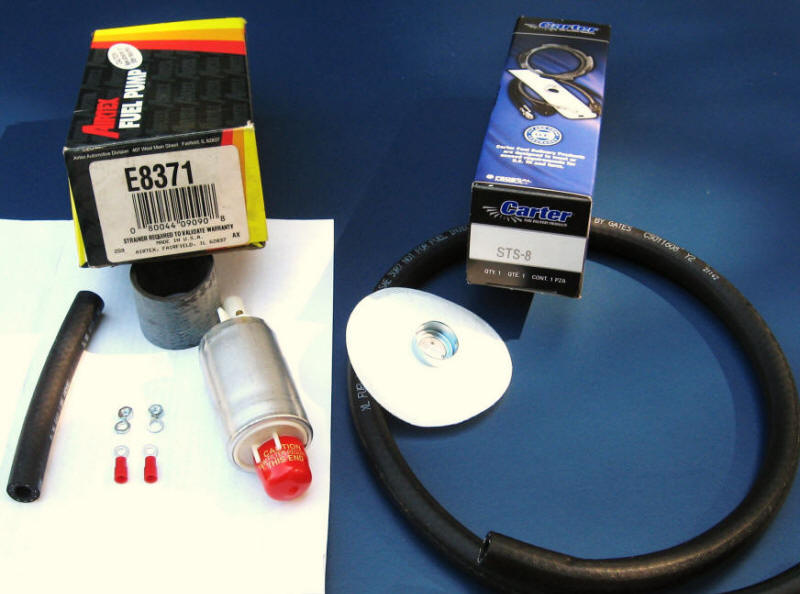
specifications. Delphi FE0009 (recommended as of now - Aug. 09 - IF you
can find one)
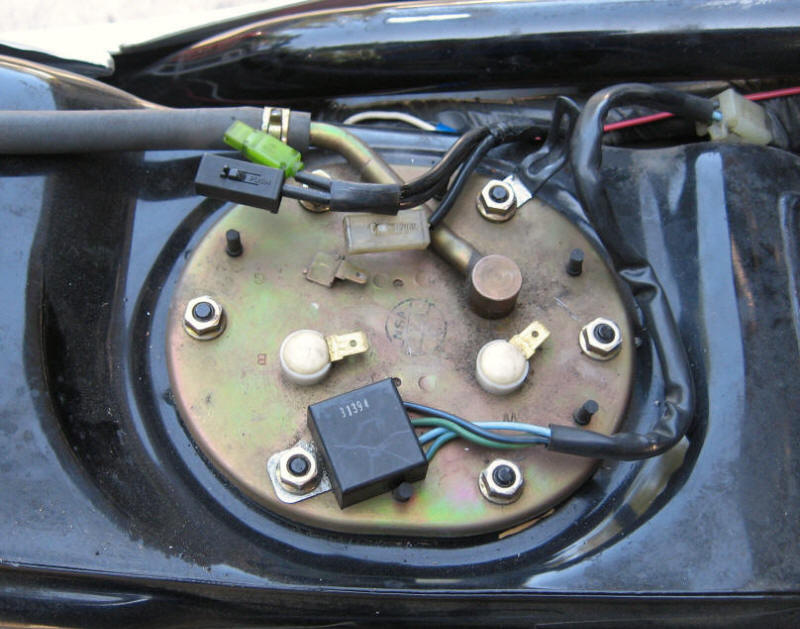
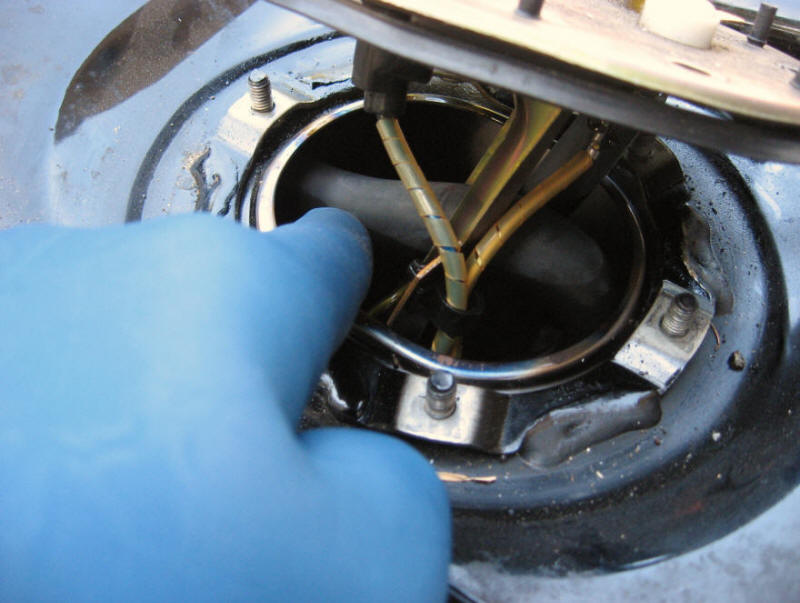
Remove all 6 of the 10mm nuts holding the cover on (don't drop any into the bowels of the bike!) and slowly lift the cover up about 2-3 inches then stop. You'll see a hose leading to the front of the tank (see pic). There is a metal connection right there that you cannot see. Simply pull the hose loose from the connection. There should not be a clamp.
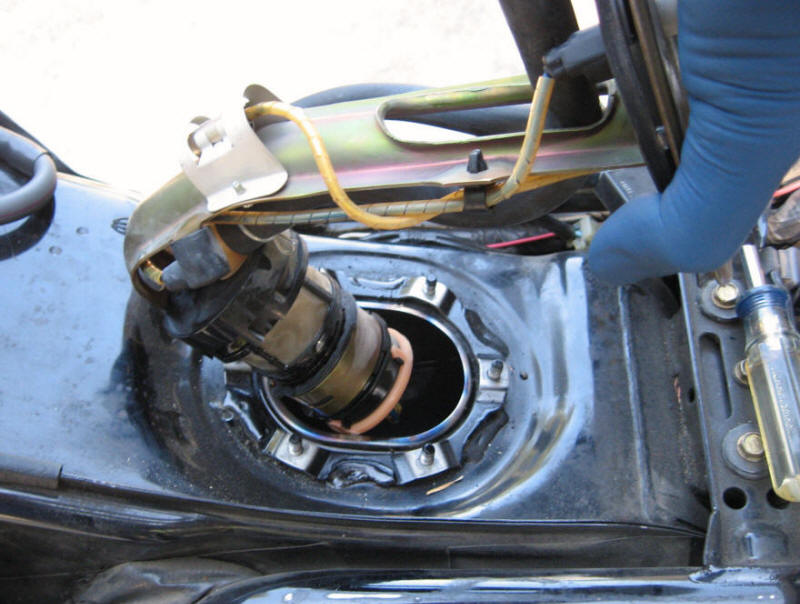
Now you can slowly lift the pump/cover assembly up and out, rotating the top end towards the back of the bike as you lift (see pic).
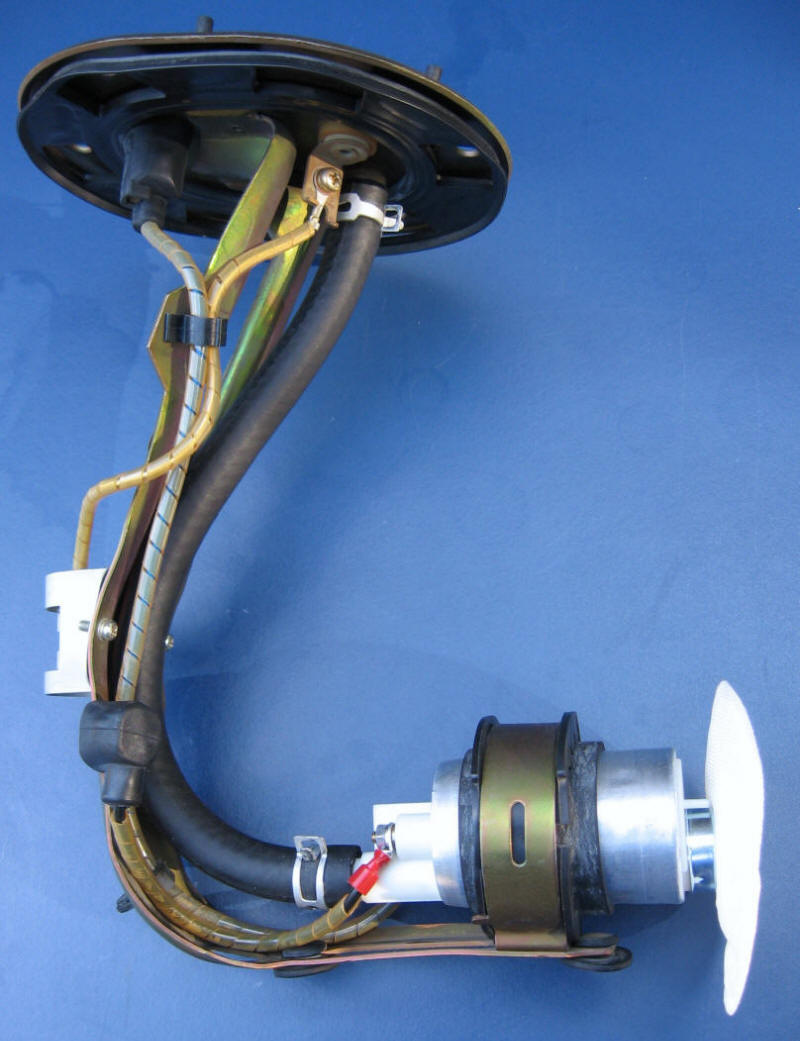
Now cut the 2 wires close to the pump and remove the hose from the fitting on the tank cover. Finally, remove the screw from the band clamp that holds the pump/strainer assembly and remove the assembly as shown (see pic).
You only need to keep one part from the assembly you just removed. The rubber "donut" bushing that the band clamp goes around. Just roll it off the old plastic pump housing.
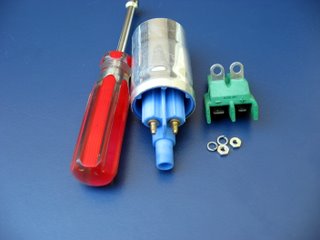
I think this picture pretty much tells the rest of the story. First, slide the rubber sleeve that came with pump onto the pump body, then the rubber "donut" bushing you removed from the old pump housing over the sleeve. Now mount the new pump in the band clamp with the inlet at the bottom and tighten the screw down. Fit the new 5/16" hose, cut to length and clamp in place. Position and cut the wires and crimp on the ends with a real wire crimper. Pliers would work but the connection would have a greater chance of working loose. I suppose you could solder the connections just to be anal about it. Make sure you keep the positive and negative connections straight. Finally, press the strainer onto the inlet of the pump and you are ready to drop it back in. So what about the other hose that connects to the fitting just inside the tank opening??? Well, it is just a breather tube and is not needed with the new pump. This is not just from me but from others who have gone down this path before and the second hose is simply not an issue. The only thing that might be an issue is slightly reduced fuel capacity before you run dry. If you are someone who regularly takes it down to "fumes", then those "fumes" might come a a few miles sooner but it is not going to be much different. I suppose if you just HAVE to know, then run the pump dry and see how much fuel is left. OK, so how do I know if it made any difference? When will I encounter exactly the same conditions that triggered the first embarrassing moment of sitting on the side of the road while all the Harleys rode on by? How about a fuel flow comparison? When I first suspected the fuel pump, I did a flow test as described in the service manual. An acceptable pump should flow 640cc per minute. Actually, you run it for 5 seconds and then multiply by 12. My old pump was marginal and I noticed that the fuel flow did not produce a full stream of fuel out of the fuel line. The new pump immediately produced a full stream of fuel through the hose. I didn't even bother running the full 5 seconds or measuring. I suppose I should have just for this report but the difference was obvious and substantial. So there you have it. If you think your GL1500 GoldWing suffers from "weak pump syndrome" and you've ruled out the other possible causes then this inexpensive pump changeover may just spare you from further roadside humiliation. One last item I will mention. Though I am still running the Delphi pump without issue, I carry the Airtex on the bike - just in case.
If you would like to download this document as a PDF file, you can either click the link below and it should open in your browser window (if you have Adobe Reader or another PDF reader program installed) OR right-click the link and click "Save Target As..." and select a location on your computer to save it to.
|